Prepare yourself for a really long post.
Last summer I went on a non-stop DIY fest to transform my bedroom into an artist's haven. My room was beautifully decorated and furnished only a couple of years previously, but it wasn't the practical palace I dreamt of. I wanted somewhere with the space and storage to spend many hours creating.
Last summer I went on a non-stop DIY fest to transform my bedroom into an artist's haven. My room was beautifully decorated and furnished only a couple of years previously, but it wasn't the practical palace I dreamt of. I wanted somewhere with the space and storage to spend many hours creating.
I was to start my art foundation course that coming September (which I have sadly just finished, how time flies!), and so began devising radical changes to suit my needs. My parents thought that the plan was far too ambitious...they were so right.
Because I'm an impatient woman I forgot to take before photos (a rookie mistake I will never make again), so I've drawn out a basic version of what my room looked like before the big purge:
So, a summary of my space, and its practical flaws despite its gorgeous appearance:
BED
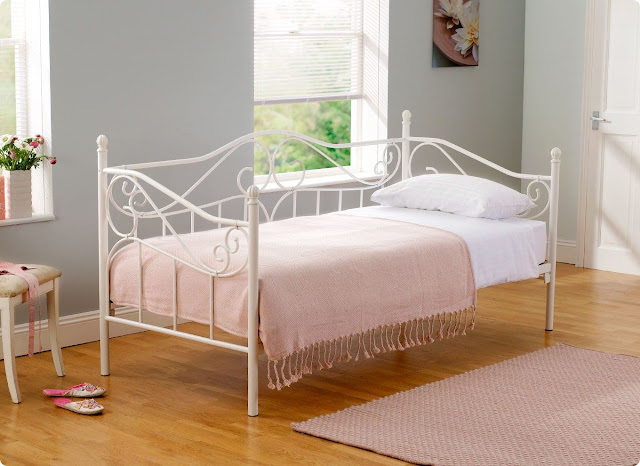
My very pretty bed was the 'Amy Day Bed' from Dreams. It was intricate and delicate looking, but stuck out from my awkward shaped bay window, and took up a lot of space in my moderate sized room.
WARDROBE
My wardrobe was the most ornate piece of furniture I owned. A reproduction french armoire, I won it on eBay for a bargain price and was in awe of its attention to detail. However it was far too small for my large collection of clothing, meaning that half of them were crumpled and creased.
DESK
My old desk was from Ikea's Mikael range (now discontinued). The issue with this was its size - it housed my computer, but was also my only workspace. It was barely big enough to sit at for essay writing, so imagine my struggle when I needed to do art homework.
CHEST OF DRAWERS
Located on the back wall of my room, this was hands down the most pointless piece of furniture I owned. Quirky as it was, the drawers were barely big enough to store my underwear. Check dimensions before you shop online people!
GLASS CABINETS
I have to say I loved these, but no longer required them and so sold one and gave the other to my dad for his DVDs. I had two Ikea Bertby cabinets (now discontinued) positioned either side of my desk, and used them for displaying my collectables. I sold almost all of these valuables last summer before redecorating, and hence the cabinets lost their purpose.
STORAGE
My only real storage was in the form of two under bed drawers. These were old, rickety and impractical. I loathed having to wheel them out and rummage through a mishmash of possessions.
COLOUR SCHEME
As you can see from the before drawing, my main colour palette was duck egg and off-white. Two of the walls were painted in Laura Ashley's Duck Egg Blue:
Whilst the other two were papered in coordinating duck egg Tatton wallpaper (also from Laura Ashley):
I love the warmth of duck egg blue, but found that having it on the walls as well as the wallpaper was very restricting. I desired a more neutral backdrop, which would allow me to bring in a wider variety of colour in general.
THE FIVE TARGETS
After evaluating my room, I concluded that I wanted:
1. A less bulky sleeping area
2. A beastly wardrobe
3. A very long desk
4. Better storage in general
5. A more neutral backdrop
MORAL OF THE STORY
What I've learnt from evaluating my previous decorating job is that you should NOT compromise practicality for beauty. It's possible to have the best of both worlds, so put function first and then consider form.
Part 2: Poor Old Plan Chest coming soon!


.jpg)


No comments:
Post a Comment