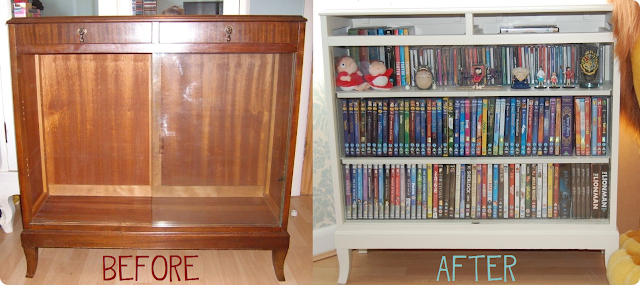
This is the 5th and final part of The Extreme Bedroom Makeover post series. As you know from Part 1, last Summer I decided that I wanted to transform my bedroom from just pretty to pretty AND practical. My five targets by the end of the project were:
1. A less bulky sleeping area
2. A beastly wardrobe
3. A very long desk
4. Better storage in general
5. A more neutral backdrop
By the end of Part 4 I had achieved all of these goals. I bought a wall bed to have more floor space, built a unique wardrobe from a 19th century fireplace surround, invested in a spacious victorian shop counter, renovated a plan chest which provided awesome storage and painted my room in a neutral off-white colour.
But I had one more unanticipated project to complete, which was the happy result of driving past my local antiques shop:
It's no secret that I have a thing for glass display cabinets, and when I saw this one with a big '£8' sticker on the front of it...well, I couldn't resist such a barg.
It later occured to me that I hadn't taken into consideration my growing need for better DVD and CD storage. At the time I had some HAMA units like this, but they were almost full and not the best looking things ever. Glass cabinet to the rescue!
It was an ugly colour, but a lovely shape and a moderate size with the potential to look very delicate.
I started off by taking out the two shelves in the cabinet. These are the brass brackets that held them in place.
The two little drawers removed. Aren't they sweet?
A little plaque inside one of the drawers reading 'Strongbow Furniture'. It seems from research that they produce rather pricey reproduction pieces, making my £8 purchase all the more satisfying!
As usual, I prepared the room by laying down sheets.
The next step was to carefully cover the glass door in masking tape and newspaper, so as not to get paint on it.
Still looking a bit crap after one coat of Dulux Primer and Undercoat.
That's better! Looking fresh after two coats.
After one coat of Clunch. I gave Farrow & Ball many a pound last summer!
FINISHED, after two coats of primer and two coats of Clunch. For a dense finsh, it seems that four coats does the trick. Isn't it a beauty?
I temporarily put my wares in the next day when it was crispy dry. I still needed to paint the shelves and drawers, though. The light was at the end of the tunnel!
Once again, multiple coats later and the shelves and drawers were ready to return to the mothership. You can also see a rather large frame in this photo, which I was preparing to make into a pinboard. More about that in a future post!
And here we have it! I'm so happy with the result - pretty AND protective of my collection. I guess you can spot 5ft tall Simba on the right? He's to be featured in the 'Lovely Things' section at a later date!
A close-up of my collection. As you can see, lots of Disney and Studio Ghibli! Animated classics are a must.
The Totoros say THANKS for reading! I plan to do a summary post for The Extreme Bedroom Makeover next, showing the overall look with everything together.


No comments:
Post a Comment